
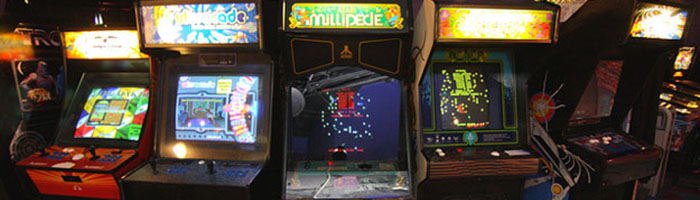
My joysticks and buttons have arrived! Exciting day. This was the first day that I really felt that this project was a reality and wasn’t just some ongoing figment of my imagination. I’m sure the day I get my MDF wood will be a similar feeling. But the beauty of getting these controls is that they are ready to play and I can set them up with my Raspberry Pi and monitor and have a play around with them right now, before I even start building the cabinet. I might try to do that this coming week in fact. All of these controls are purchased from Arcade World UK by the way.
Layout
Before I ordered my controls I had to work out what I wanted. I chose to keep it simple and not cram too much into my control panel. I didn’t, therefore, go for a spinner or trackball (I’ll put those in my second, portrait screen-orientation machine!). I also just kept it to two joysticks, rather than trying to make a four player machine. I spent ages wondering how many buttons to get. I knew I wanted 6 buttons for Street Fighter 2 but I didn’t know if I would want my buttons for older games to be separate or to be part of those 6 (if that was even possible). Rob ‘Flack’ O’Hara warned me that the Williams style cabinets, that I have chosen to replicate, normally have quite narrow control panels, so there wouldn’t be much room to play with. I took this in mind in terms of limiting the buttons I wanted, although I may still have to increase the size of the control panel and cabinet frame. I heard online that 7 buttons per player was a good number, but that’s mainly if you want to play Neo Geo games that require 4 buttons in a row. I think I don’t really have Neo-Geo high up on my list so I thought I would just keep to 6 buttons per person and keep it simple and neat.
I also had to decide what operating buttons I needed. Player 1 Start, Player 1 Insert Coin, Player 2 Start and Player 2 insert coin are definitely required. But for the other ones I thought about adding Pause, Home and Reset. I’m not totally 100% on the functionality of the MAME software I’m using in terms of whether Home and Quit Game or Reset will be the same, so I did buy a couple of extra buttons in case. But basically I want the ability to quickly go back to the main game menu, and also the ability to pause the game. I’m not yet sure if I need to have a separate button to quit the Raspberry Pi before switching off.
Colours
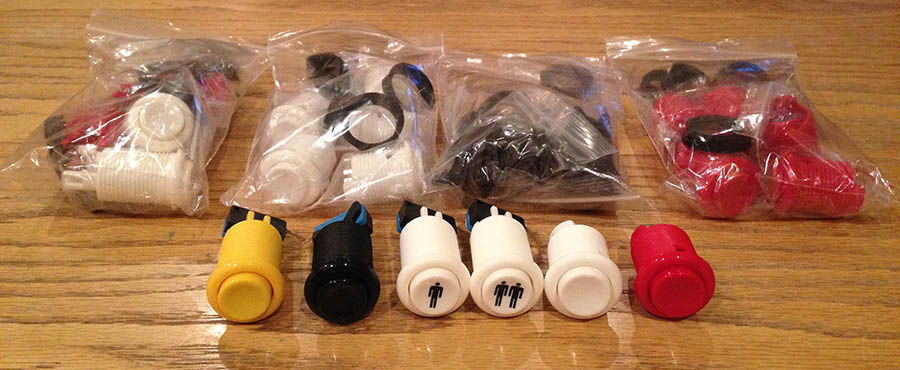
Next decision was about the colours. I spent ages swithering on what colours to get. I was still deciding what to do with my artwork and overall colour scheme so I knew I didn’t want to get too fancy with my button colours in case it clashed. For example I thought of carrying through the four-colour 8-bit rainbow theme into my buttons but then decided it might look a bit too gaudy. I also thought that I might highlight some of the bottom row buttons a different colour, because although it would be obvious what buttons were to be used for Street Fighter 2 it might not be as obvious what buttons to use for Space Invaders or Track & Field for example. So I thought about maybe making the first one or two buttons on the bottom row a different colour from all the rest. But in the end I once again thought I would go for the most simple, clean approach and I chose to go for all red buttons in the bottom row and all white buttons in the top row. This highlights that the buttons for simpler game are on the bottom row but also keeps some uniformity when using all 6 buttons for games like Street Fighter.
For the visible operating buttons on the front (Players Start, Pause and Home) I went for white, except for the main Home button which will stand out in red (or possibly yellow, I got both). And for the insert coin and reset buttons these will be black and will be hidden underneath the control panel. I didn’t want to have too many buttons visible.
Joysticks
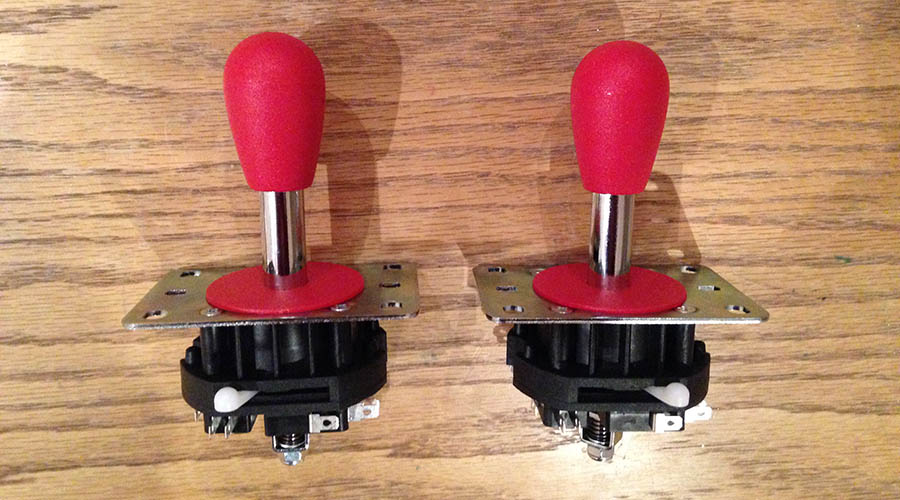
After a lot of research I plumped for the Mag Stik Plus joystick from Ultimarc. My main concern about joysticks was that I wanted a switchable 4-way to 8-way joystick, as I explained in a previous post, so that I could play older games and more modern games in the different ways that they were meant to be played. Some other joysticks offered this switching but you had to use a tool to switch them or at the very least get under the control panel to adjust them. I wanted something that was easier to switch and the best one on the market seemed to be the Mag Stik Plus as all you have to do is lift and twist the joystick handle. It’s got pretty good reviews and the only issue people have mentioned is that it can be a bit stiff and it has a short throw. Upon playing around it with just now I think it’s fine and I’m pretty happy with it. I originally thought I would want a ball joystick but after going down to my local arcade to test joysticks I felt I actually preferred the bat handles anyway. Not sure if I can switch the handles on the Mag Stik Plus if I wanted to try ball handles on it. This joystick is available from Ultimarc.com, who I believe manufacture it themselves, but I got mine through Arcade World UK as mentioned above.
Buttons
As mentioned in my previous post I wanted to get buttons with leaf switches instead of microswitches for the main game buttons as I didn’t want the loud clicks that microswitches give you when hitting these main buttons repeatedly. I followed this through and bought 12 ‘Gold Leaf Concave Arcade Buttons’.
But for my operation buttons I chose to go for microswitch buttons, as they have a more satisfying click which are good for actions like this where you aren’t pressing them repeatedly. For the microswitch buttons I went for the standard ‘Classic Arcade Button’ again from Arcade World UK.
I’ll film a video comparison of the sound of the leaf switch buttons and the microswitch buttons and add it to this post in a week or so, so check back if you want to see that.
I had thought about getting some light-up buttons, or even a light-up Insert Coin button, but in the end I didn’t want to have to muck about with extra power sources and extra wires. I thought I’d start simple and then I can always upgrade buttons in the future if I wanted to. One nice touch about having light up buttons is that if you add some kind of special controller, I believe, then some games make the Start buttons flash when you insert a coin. That’s a nice touch that I’d love to maybe have one day. I had even found a glow in the dark button somewhere online. I am a total sucker for anything glow in the dark but I didn’t save the link and I couldn’t for the life of me find the link again when I was thinking of buying it.
You can see the planned layout for my panel below. I’ve gone for a fairly simple and minimalist control panel and I’m hoping that will make my life easier and do the job well.

Next steps in this area
– Experiment by drilling holes in a test piece of wood, setting up the control and testing them with my Raspberry Pi and TV monitor
– Work on my control panel overlay artwork
Here’s a list of all the posts about my arcade build.
Part 1
Part 2 – Decisions
Part 3 – Cabinet Design
Part 4 – Control Panel Plans
Part 5 – Initial Questions and Concerns
Part 6 – Online Resources
Part 7 – Cabinet Plans
Part 8 – Buying and Cutting the Wood
Part 9 – Tools and Materials
Part 10 – Building the Cabinet
Part 11 – Building the Control Panel
Part 12 – Sanding and Painting
Part 13 – The Coin Door
Part 14 – Artwork
Part 15 – Printing and Applying the Vinyl
Part 16 – Adding all the T-moulding
Part 17 – The TV Monitor
Part 18 – Making the Bezel
Part 19 – The Marquee
Part 20 – Installing the Electronics
Part 21 – Setting up MAME
Part 22 – Issues to Watch Out For
Part 23 – The Finished Cabinet
Building a Home Arcade Machine Part 11 | Retromash
May 15, 2016 -
[…] hinges as well as all the buttons on the front and bottom. I discussed these in my post about the Control Panel Plans. The front panel obviously has Player 1 and Player 2 buttons. The yellow one is the main button to […]