
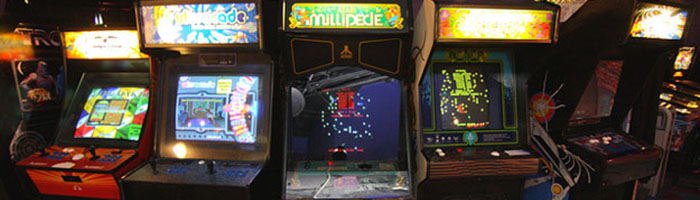
Having an arcade cabinet in my home has been a goal of mine for many years. I’m not the kind of person to want things like flash cars or a big mansion house. I just want a happy marriage and healthy kids, both of which I’m very lucky to have, and the main material luxury item that I have always really wanted is an arcade machine. I only ever used to play them in the past as a real treat, on holiday or on special occasions. Now that I have one, at the tender age of 40, it’s great and the fact that I’ve been able to make it myself makes it even more special.
And let’s make one thing clear, I really have no experience of making things like this. I like to thing I’m creative and reasonably arty, as I went to Art School, but I don’t have any real experience of using tools to build anything like this. So if I can do it, you can do it.
I wanted to document the whole process, hence the 23 part blog post series, because I gained so much knowledge and motivation from watching other people make theirs online, such as Abs Delfuego, Neil Neg and Bob Clagett. I will be letting them all know just how useful their videos and blog posts were to me. I’d love to think my posts might help someone with their build in the future. So if you gained any useful knowledge at all from reading these posts then please do let me know. I’d love to hear from you. And if you have any questions at all please do not hesitate to contact me to ask a question. Seriously, this was a labour of love and I could talk it about it until the cows come home.
Anyone can do this. If you have the time and patience you can build an arcade machine. It’s a great feeling to have the finished product at the end of the process. Here’s a quick GIF to show the process in 7 seconds.
One thing I’ve really taken from the project is that it has rekindled a passion within me for making things with my hands. I used to be hands on artistic/crafty but my art has gone a predominantly digital way for the past 25 plus years. It felt great to be designing things that were going to become tangible objects and then actually build them myself. YouTube channels and podcasts such as I Like To Make Stuff and Making It have inspired me to join the maker community and I’m already thinking about what I can make next.
Here’s a list of all the posts about my arcade build.
Part 1
Part 2 – Decisions
Part 3 – Cabinet Design
Part 4 – Control Panel Plans
Part 5 – Initial Questions and Concerns
Part 6 – Online Resources
Part 7 – Cabinet Plans
Part 8 – Buying and Cutting the Wood
Part 9 – Tools and Materials
Part 10 – Building the Cabinet
Part 11 – Building the Control Panel
Part 12 – Sanding and Painting
Part 13 – The Coin Door
Part 14 – Artwork
Part 15 – Printing and Applying the Vinyl
Part 16 – Adding all the T-moulding
Part 17 – The TV Monitor
Part 18 – Making the Bezel
Part 19 – The Marquee
Part 20 – Installing the Electronics
Part 21 – Setting up MAME
Part 22 – Issues to Watch Out For
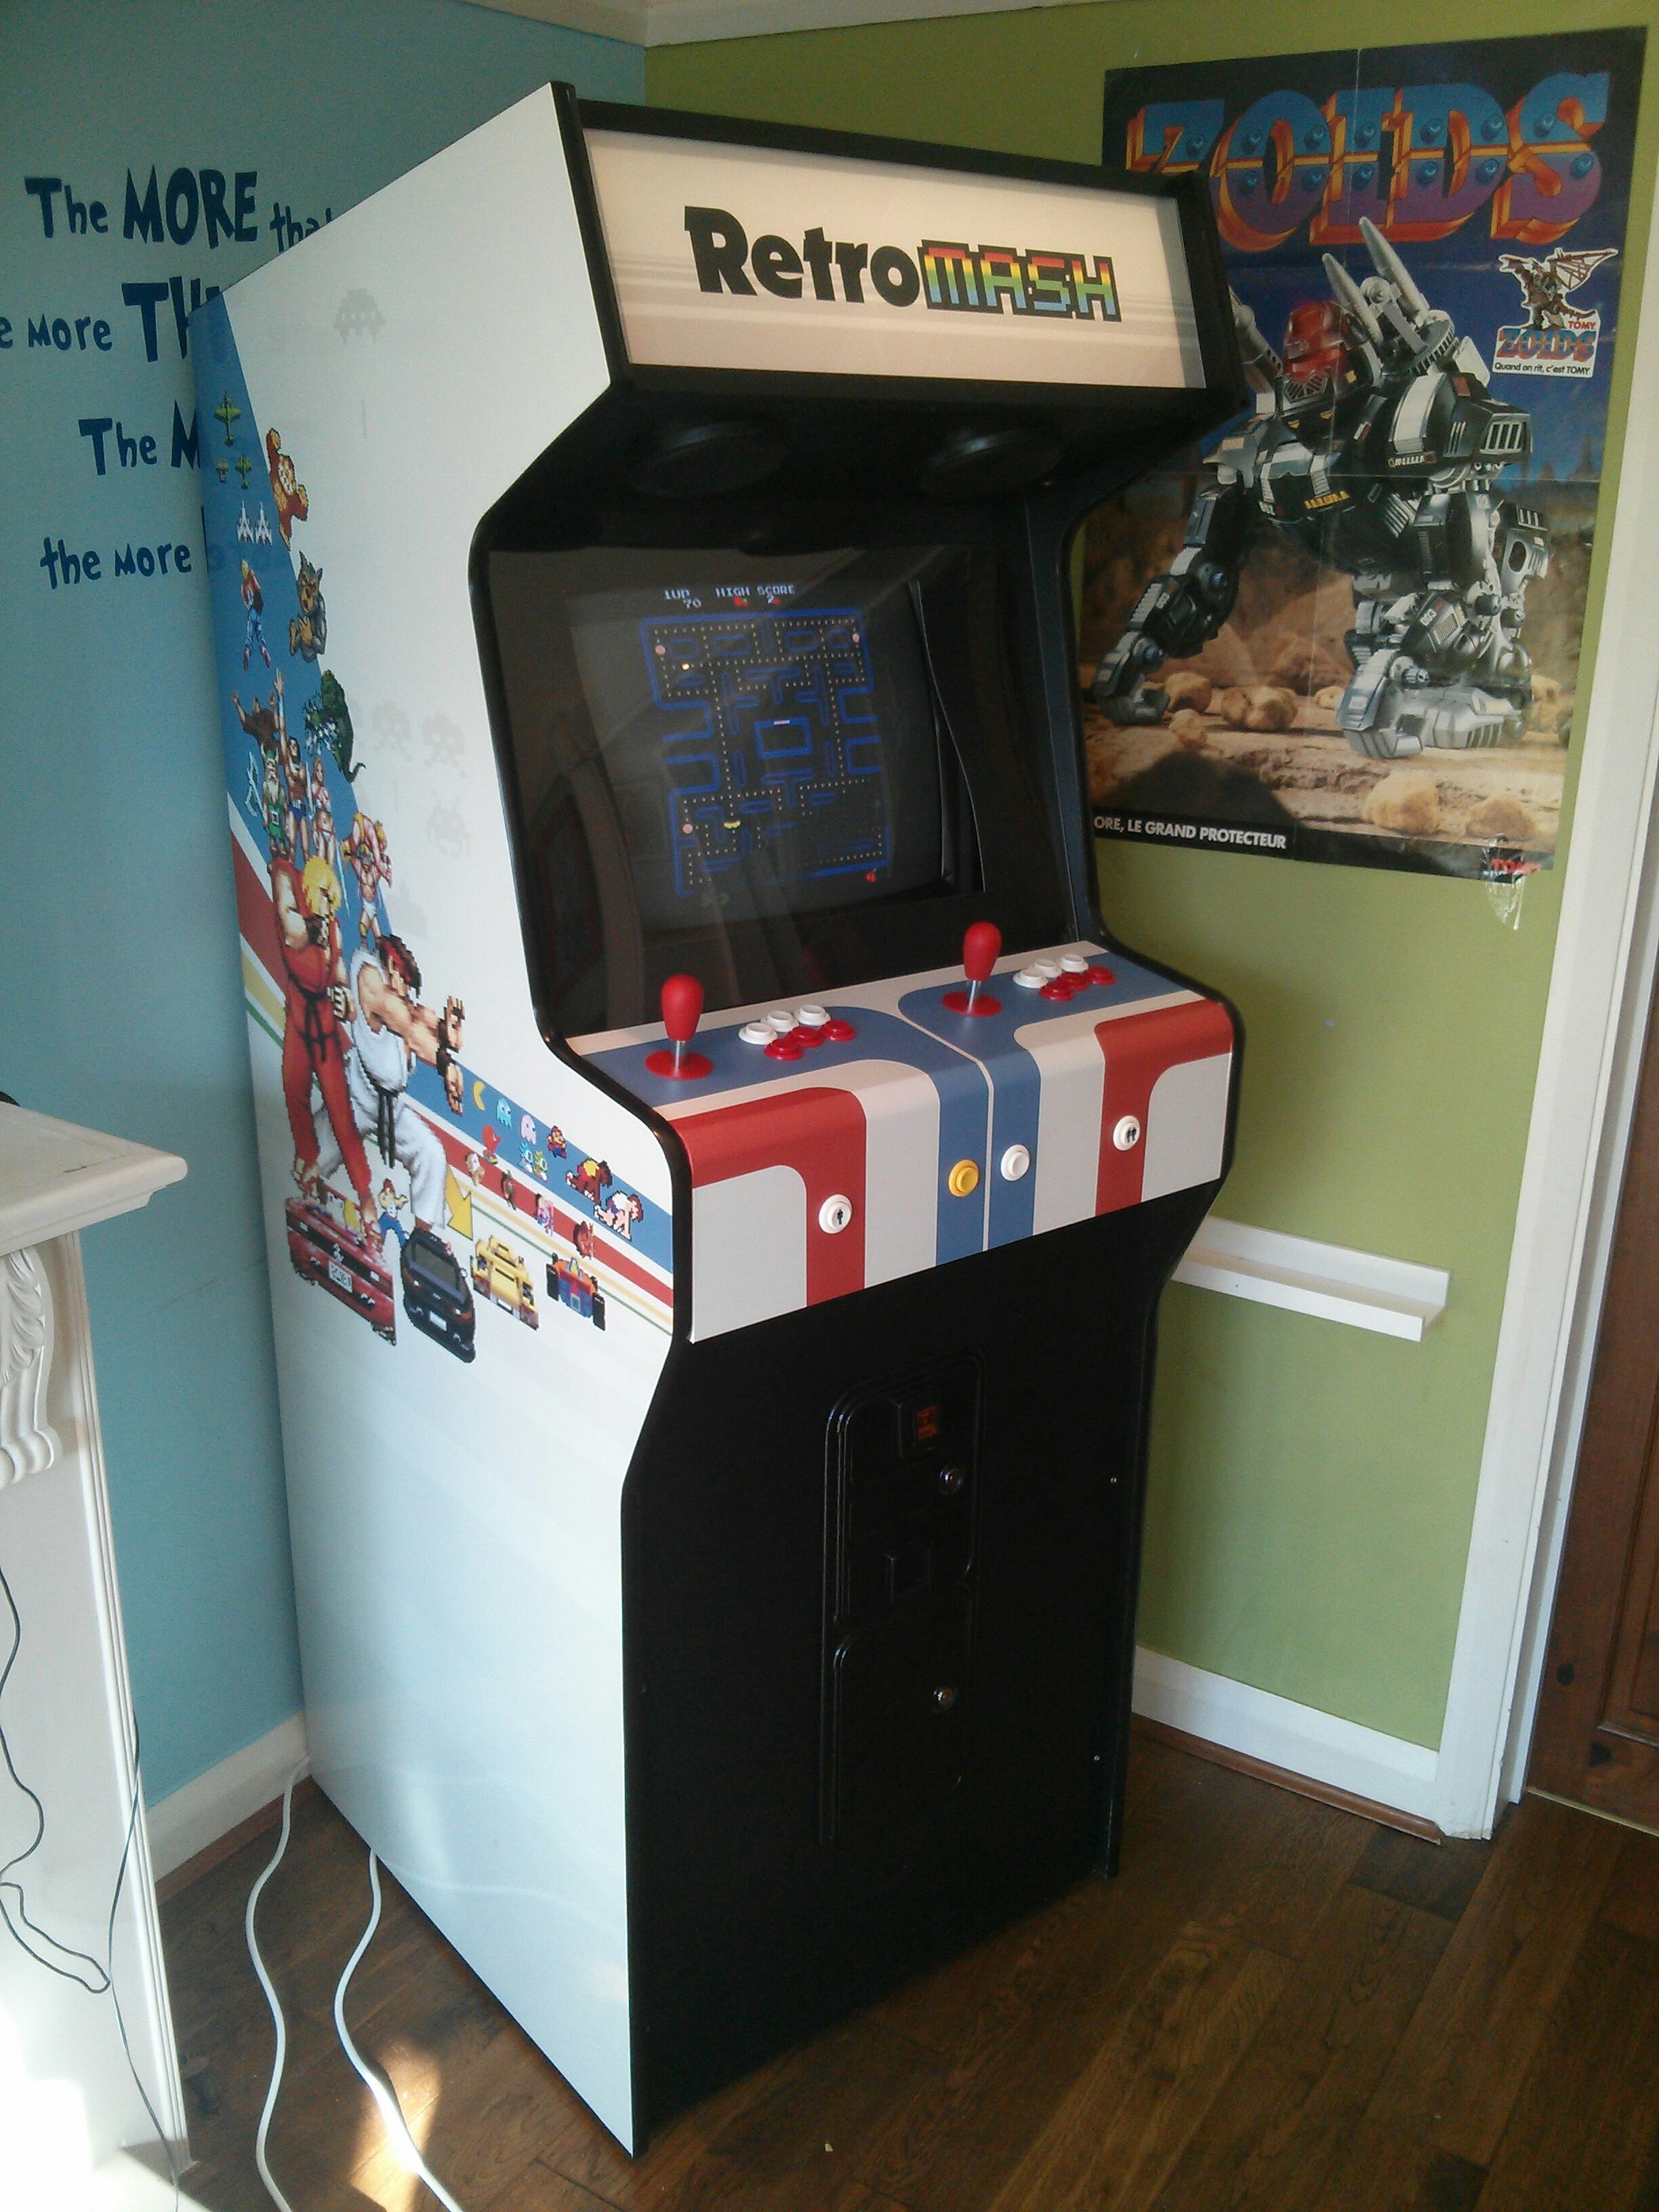
Part 23 – The Finished Cabinet
Here’s a one minute video showcasing the final product. Let me know what you think in the comments below. I’ve gotta go now. I’ve got some games to play :-)
Alex
Aug 1, 2016 -
What a fantastic project,I have great respect for guys that can asemble a machine for scratch like this.i like the fact you have used a CRT as aposed to a lcd flat screen and I love the art work.
Well done
Retromash
Aug 1, 2016 -
Thanks a lot, Alex. Appreciate that. Right back at you, as I respect guys like yourself that recover, restore and preserve classic machines, like your Nintendo cabs, with the respect these historical items deserve.
If you’re ever in Southend, you’re very welcome to pop round to have a look at my cab if you want.
Charlie Z
Sep 18, 2021 -
CRT=Duck Hunt!!!. Great work! Thanks for sharing. I will be referencing this for my build. Galaga and Metroid based theme. Can’t wait. Cheers!
Jason M.
Feb 26, 2017 -
What an awesome series! I sat here and read the entire series in a single sitting. As someone who’s just finished ordering most of my items and is waiting very impatiently for them to show up, this is exactly the article I was hoping to stumble across! Thank you so much for posting it and being so in depth in most areas. I never knew about Sketchup before this article, I know that’s going to save me in so many areas! Truly a great article.
Now if I could only pick my side art…..
Retromash
Feb 27, 2017 -
Hi Jason,
Thank you so much for your message. I got so much help myself from researching other people’s projects on the internet and I was hoping that at least one person would be helped by my articles and let me know about it. That’s the whole reason I documented the process. I’m really glad it helped you. Good luck with the rest of your project and please let me know how you get on. Please don’t hesitate to ask me any questions along the way too, as I love to talk about this stuff. Also let me know if you think there were any details missing from my posts from your perspective, as I would want to go back and update them for future people who read them.
Thanks a lot.
Michael
Zipper
Apr 17, 2017 -
Excellent work. Congrats on creating a beautiful cab! I’m in Southend and looking to get a clear acrylic bezel cut for a project cab. Where did you get your 6mm plastic cut? It looks super and I’d like to use the same people if possible.
Cheers,
Barry
estabon
Oct 16, 2017 -
Fantastic job dude, quite authentic. I’m currently working on a small bar top project and this is quite useful.
Retromash
Oct 17, 2017 -
Thanks very much. It’s great when I hear that it has helped other people, so thanks for letting me know. Good luck with your bar top!
My trip to the incredible Arcade Club UK, the biggest retro arcade in Europe | Retromash
Nov 6, 2017 -
[…] I now have my own home made MAME arcade machine I have the luxury of being able to play lots of the standard arcade games any time I want, but […]
Bjorn Harris
Apr 3, 2018 -
Just finished reading your story and what a project. And what a man for taking the time to share with others.
Sounds like you were in the same situation as me now.
Little woodwork experience: tick, enjoyed some arcade playing when younger: tick, just turned 40: tick, looking for a fun challenge: tick.
Thanks again.
Question is – do you still switch it on and play much?
Made any upgrades?
Retromash
Apr 3, 2018 -
Thanks very much Bjorn. And yes I do still play it as regularly as I can. It helps having a 6 year old son who likes playing it too!
Tulio F
Jul 20, 2018 -
I just finished building my own arcade cabinet, and I really would like to thank you for such a detailed explanation of all the aspects. I went with the Moon Patrol design and the CRT as well, so the shape looks just like yours, but mine is in black, with blue details on the left and red on the right. Building it was great and satisfying, but playing it is even more! It throws you back a couple of decades… Thanks for sharing your expertise, it helped a lot!
Retromash
Jul 20, 2018 -
Fantastic! Really pleased that you managed it and great to hear that my posts helped in some way. Thanks a lot for letting me know. Are you able to share pictures at all? I’d love to see it. [email protected]
Tulio F
Jul 20, 2018 -
More than helped, it was a guideline! I’ll take some good shots this weekend and send you. It’s still not perfect, I’m not pleased with the printing of the transparent stuff, specially the marquee, so probably I will redo it (but since it won’t be in the near future, I’ll send the pictures as it is). Overall, I’m very pleased with the final result!
Retromash
Jul 24, 2018 -
Great. I really look forward to seeing the photos!
Eduardo
Sep 6, 2018 -
I was looking for an example of a diy arcade cabinet to make my own and the blog of your project exceeded what I expected to find. The final product looks awsome and I admire how you did it from scratch and the way you explained the steps in depth. Currently I am building my own and I’d like to ask you some questions about some specific things in it; would that be possible? Anyways, cheers!
Retromash
Sep 6, 2018 -
Hi Eduardo. No problem! Yes of course I’d be happy to help. Please send me an email to [email protected]. Cheers
Lee
Apr 26, 2019 -
Hello. I just wanted to say what a brilliant project. You made each step so easy to follow. I’m halfway through building my own and have constantly gone back and forth referring to each of your stages. I’m also going to use Olly from Arcade Art after your recommendation. He’s really professional. Your machine looks amazing. Well done, matey
Retromash
Apr 26, 2019 -
Thank you very much indeed Lee! Really appreciate you taking the time to leave such a nice comment. I’m extremely glad that my project was able to help you with your build. Please do send me photos when you’re done! Cheers! Michael
Austin Sutton
Jul 6, 2019 -
How much did this cost you? I’m making a Super Smash Bros Ultimate Arcade cab and wanted to know an estimated cost.
Retromash
Jul 6, 2019 -
Hi Austin. Hard to say actually because I had to buy some new tools as part of the process too. I think I spent around £900 overall but I went for the best joysticks etc and full vinyl covering (the vinyl is quite expensive). I reckon if I already had most of the tools and went for less vinyl I could have brought it down to around £400-£500.
Anthony Cronin
Sep 14, 2019 -
Hey RETROMASH,
Have you ever tried to do an arcade cabinet for gun games only. Stuff like virtua cop or house of the dead.
I’m looking at doing one and haven’t started the cabinet part.
Cheers.
Retromash
Sep 14, 2019 -
Hi Anthony. I’ve thought about doing a second cab but just don’t have the time or money right now. I think I would do a driving cab next. I’m not sure if gun cabinets have extra complications in terms of the internal workings. I haven’t looked into it. I’d be interested to hear how your research goes!
Anthony Cronin
Sep 15, 2019 -
Cheers for the response.
Great cabinet byw.
I might use my Dreamcast and Saturn in a cabinet instead.
Timeless arcades to build and enjoy | Retromash
Nov 15, 2019 -
[…] your very own machine. You’ve probably seen Retromash’s head honcho Michael’s home arcade machine that he built. That was a generic cabinet, but many other people like recreating specific […]
Retrogaming Into The Next Decade | Retromash
Mar 27, 2020 -
[…] machines there have been several new options in the last couple of years. You don’t just need to build your own home arcade machine like I did. If space is an issue then you could start collecting the tiny arcade machines by Super […]
Justin R
Apr 9, 2020 -
Hi Michael!
I just wanted to say a massive thank you for such an amazingly detailed and easy to read/follow blog.
I have had your arcade build link saved in my bookmarks for a good few years now.
And I’ve been saying I’m gonna build one myself for much longer.
At last I finally have all the necessary bits and bobs and will be starting to put it all together as soon as possible (with the help of your blog)
I can’t wait to say to my 7 year old daughter “look what Daddy built” and then destroy her on Street Fighter!!! Ha ha! No no I mean team up together on Bubble Bobble.
Retromash
Apr 9, 2020 -
Hi Justin, that’s great! Thanks so much for leaving a comment. Please do let me know how you get on. Hopefully your daughter can build her skills up on MAME before the arcade gets built ;-) Good luck with the build!
Anthony
Apr 10, 2020 -
Hey,
Nearly finished my arcade cabinet with hyperspin pc, sega saturn and dreamcast. Installed the two consoles mainly for gun games.
Still messing around with the look and also the plexi glass but seems to be coming together. Has all the electrics and also a 21inch Panasonic crt.
Be good to maybe discuss ideas.
Retromash
Apr 14, 2020 -
Sounds great. Well done!
Jeremy
Jun 20, 2020 -
Amazing job and thanks for the documentation. Wish i had found this before finishing mine. I love the console you did and how its all one piece. My biggest mistake is my marquee, it is mounted from behind and the offset kinda upsets my OCD. I may do another one and will use this as some lessons learned!
Awesome stuff and thanks for the time to document.
Retromash
Jun 20, 2020 -
Thanks very much for the comments, Jeremy! Good luck if you do build another one. I’d love to see pictures.
Chris
Sep 18, 2020 -
Beautifully done! I learned tons from reading and watching your blog:) Now it is time to make one for the wife and I, rekindle those glory days of going to the arcade, sliding $5 into the quarter machine, grabbing that big handful of quarters and playing my favs for hours :)
Thank you so much! You have inspired me to do something I never thought Id do, put a full size arcade game in our castle.
Retromash
Sep 18, 2020 -
Thanks so much for your comments Chris. And great to hear you are going to make one yourself. Good luck with the build and please do share pictures when it’s done! Michael
Michael Reed
Apr 19, 2021 -
Great article – thank you it really gives me an idea how to go about it !
Retromash
May 11, 2021 -
You’re welcome Michael. Glad you liked it! Good luck!
Robert Kaitse
May 11, 2021 -
Hey,
This was really quite an amazing blog to follow. Thanks for the all the details and the resources. It took me from the ‘can I?’ stage to my finished machine. Yours is awesome.
https://drive.google.com/file/d/1hPZuJtJ9TLNbiQzniS7VkGCycaWiEg_2/view?usp=sharing
I did everything myself except the printing and sticking of the vinyls. Some guys in town did it for me. Custom decals a must.
I made this years ago but really thought it appropriate to give you the kudos. Really nice work, inspiring.
Retromash
May 11, 2021 -
That’s awesome Robert. Great work. I really love the decal and how the blue and red electrical lines end up on the buttons. It can be tricky to get all that stuff aligned correctly!
Thanks a lot for sharing with me and I really appreciate your comments. Cheers.
Al
Jul 18, 2021 -
This is great, Im doing the same thing only making a Midway Mortal Kombat II cabinet, they are so expensive to buy now £3000 upward for a poor condition cab so thought i would make one, i own an original street fighter 2 Champion Edition cab which i fully restored and seeing how that one is made and put together will adopt the same ideas for my midway cab, i will be using a proper 25″ Arcade crt monitor though and rather than mame will be using a jamma set up and original pcbs like my sf2 cab has.
4 Fantastic Additions For A Retro Entertainment Space | Retromash
Jan 6, 2022 -
[…] these days that are making replica machines on the market. Or of course you could always make your own arcade cabinet as we did at Retromash. And the other option, of course, is just to collect some old retro video […]
4 fantastic additions to a retro entertaining space
Jan 17, 2022 -
[…] many manufacturers making replica machines on the market these days. Or of course you always could Make your own arcade cabinet like we did at Retromash. And the other option, of course, is just to collect some old retro video […]
Megalocade
Apr 29, 2022 -
Very nice indeed, it was this post that gave me the idea of making Capcoms Big Blue cabinet, being in the UK they are very rare in fact i haven’t seen one since 1993 and that was in the arcades and I’ve never seen any forsale in my country, i love the look of them because they are huge and sound awsome, I’ve just started my own Diy build and very much enjoying putting it together, looking forward to when its completed, it will be a Super Street Fighter 2 Turbo cab as that is my game with original cps2 board and a 25″ crt Arcade monitor, I’m making it a close as i can to the original.
https://www.flickr.com/photos/192553552@N03/
Unique Entertainment Ideas For a Business Event | Retromash
May 16, 2022 -
[…] for employees young and old is to hire some old video game machines. This could be a combination of arcade machines for the older clientele and consoles such as the original PlayStation for younger employees. Not […]
The History of the Slot Machines | Retromash
Dec 23, 2022 -
[…] in 2022, retro media is back. For example, classic video games and consoles such as the Game Boy or retro arcade machines, are all the rage. Many of us remember playing on these devices back in the 80s and 90s. The slot […]
The History of the Slot Machine | Retromash
Dec 23, 2022 -
[…] in 2022, retro media is back. For example, classic video games and consoles such as the Game Boy or retro arcade machines, are all the rage. Many of us remember playing on these devices back in the 80s and 90s. The slot […]
Gaming Across Generations: How Retro Themes Bridge the Gap | Retromash
Jan 22, 2024 -
[…] creating a fusion of classic and contemporary elements. Developers are strategically integrating old-school mechanics into modern titles, providing players with a sense of familiarity while introducing innovations. […]
Building the Arcade Cabinet, Part 1: Planning – Funtechnow
Feb 17, 2024 -
[…] https://retromash.com/2016/06/01/building-a-home-arcade-machine-part-23-the-finished-cabinet/ […]